Discover two different strawberry runner propagation methods that I use to grow new strawberry plants with little expense
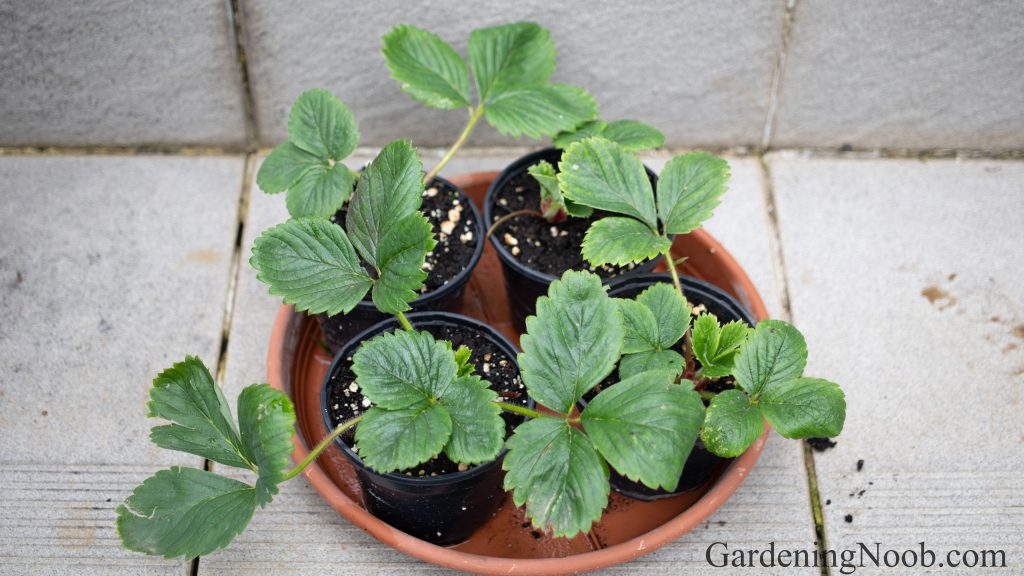
Our neighbour has had a thriving patch of June-bearing strawberry plants for years. Seeing how mch our son loves strawberry fruits, she offered to give us about two dozen baby plants to start our own strawberry patch. This was in August 2023. I gladly accepted the new plants, even though we already had a patch of everbearing strawberries that we bought at a plant nursery earlier that year in spring. She instructed us to plant them as soon as possible and water them thoroughly every day for several weeks…
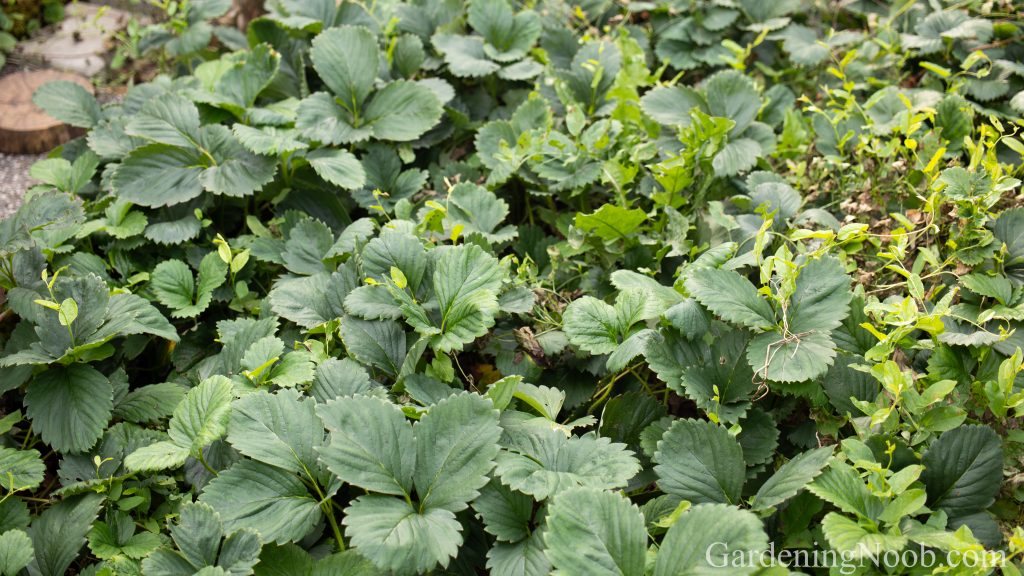
Fast forward a year, and only half of those baby plants survived, with just one of them producing fruit. The interesting thing, though, was that all of the survivors started producing a mass of runners. Just imagine: runners everywhere, and they seemed determined to take over every open spot in the patch – even the weeds had trouble competing with them!
I didn’t want all those runners to go to waste, so I decided to propagate them. I used two different methods. The first one is faster and requires less work but has a lower success rate. The second one takes more time and effort but has nearly a 100% success rate. I explain both in detail, and if you’re the kind of person who would love to expand your strawberry patch with little expense, then you’re going to love this – keep reading to learn how to propagate strawberry runners into new plants.
The cut-and-pot strawberry propagation method
I use it to propagate strawberry runners with well-established roots.
The first strawberry propagation method – I call it the “cut-and-pot” method – is very simple. I find a runner, cut it from the mother plant, plant it in a soil-filled pot, and grow it there until it becomes well established and ready to be moved to the garden. This is essentially what I did with the runners I got from the neighbour, except that I skipped the potting part and planted them directly into the garden.
The pros and cons of the “cut-and-pot” method
- This method is fast and does not require much effort. The main advantage is that you can plant dozens of runners in one afternoon and have established strawberry plants ready in around three to four weeks.
- But it has a low success rate. The main disadvantage is that to keep runners alive and help them develop roots, you need to maintain consistently moist soil during their first two weeks. This can be challenging in hot summer weather because it requires constant watering and often leads to root rot and causes many runners to die.
The details of the “cut-and-pot” method
There are six steps to the cut-and-pot method. The details really do matter, and it’s worth keeping them in mind. Now, here’s how I go about it:
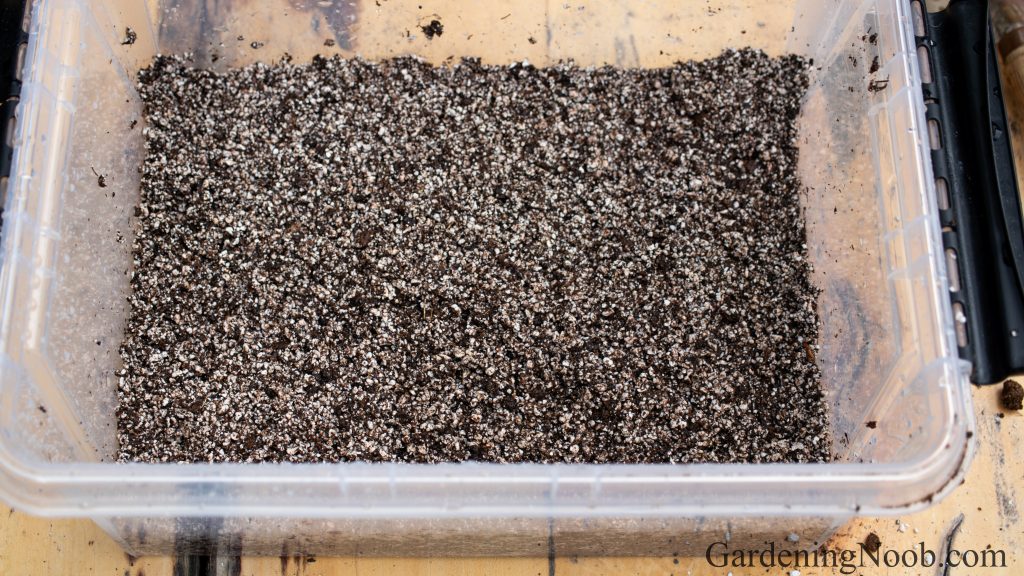
Step #1: Get the potting mix ready and fill the pots with it.
The first thing I do is get the potting mix ready. I have tried out several different potting mixes, and it took a few tries to get it right…
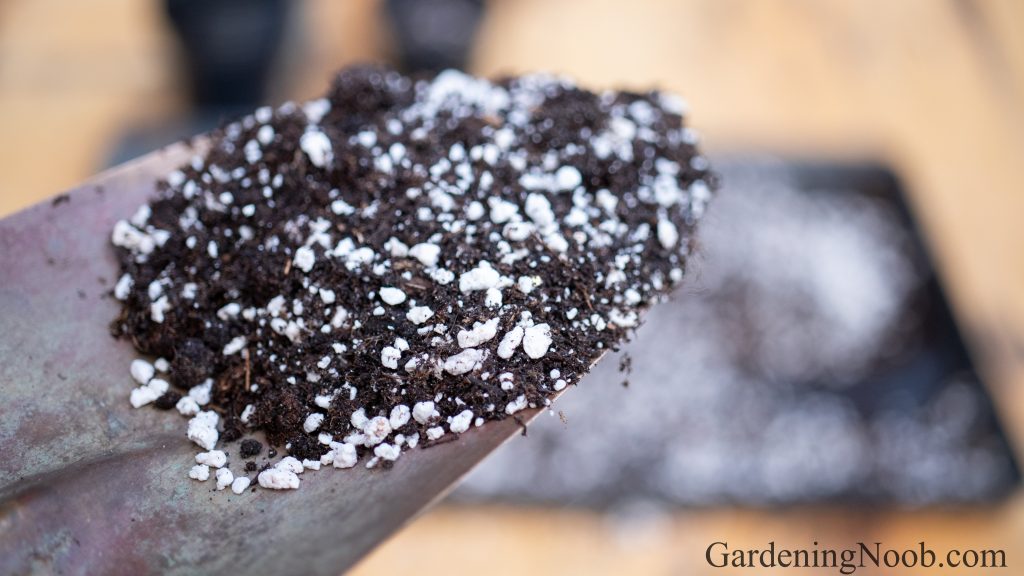
In my first attempt, I mixed a regular semi-coarse potting soil with earthworm castings in a 3:1 ratio. Many runners did well in it, but I lost quite a few of them due to root rot. This mix was too dense and did not drain well, which led to waterlogging and eventually caused root rot.
Then I switched to a better-draining mix, which consisted of:
- two parts regular semi-coarse potting soil,
- two parts perlite,
- and one part earthworm castings.
The perlite helped improve the drainage, and I have been losing fewer plants since.
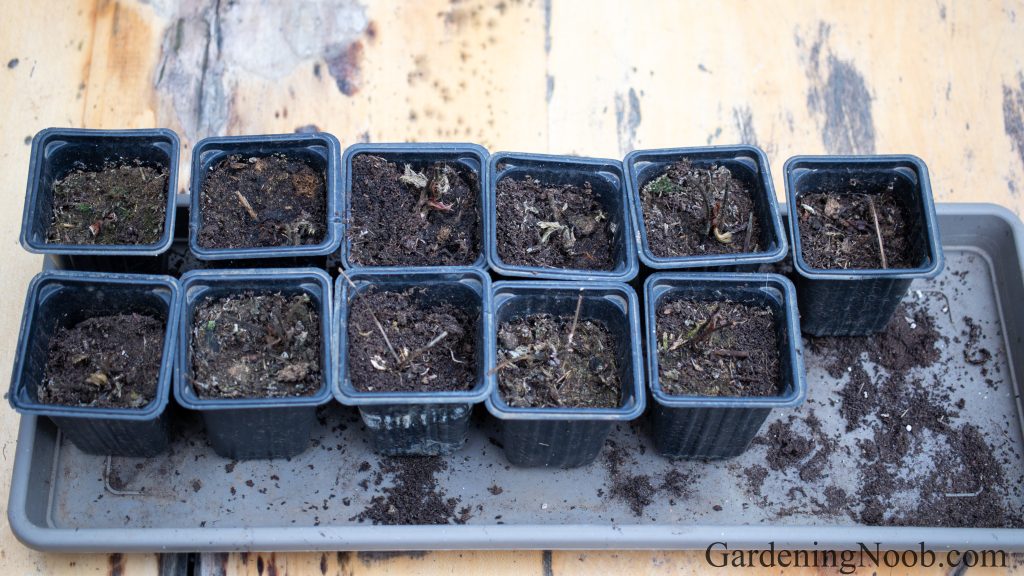
Once the mix is ready, I fill the pots with it. I first tried smaller rectangular pots that are 8 centimeters (3.15 inches) tall and 7 centimeters (2.75 inches) wide at the top. These can work well in autumn when it is no longer extremely hot outside – but only if you use a well-draining mix, water more frequently (smaller pots dry out faster), and transplant them in the garden as soon as roots develop.
I did not like the idea of even more frequent watering, so I switched to round, standalone pots that are 10 centimeters (5 inches) wide at the top and 8 centimeters (4 inches) deep. I do use more soil, more fertilizer, and more perlite with these, but it reduces the risk of root rot and makes summer propagation a bit easier too.
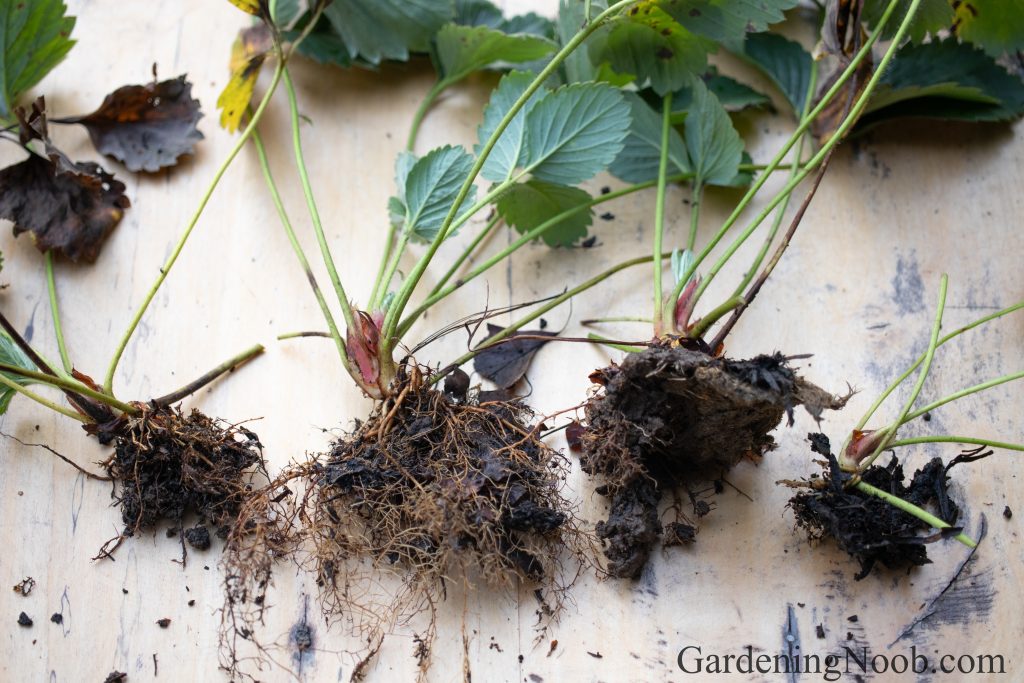
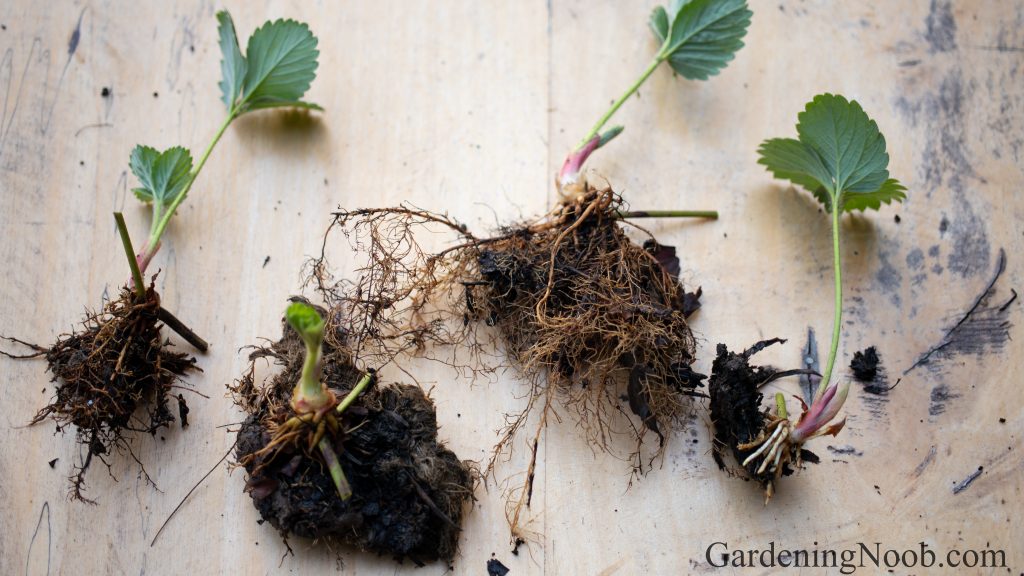
Step #2: Find the runners with strongest roots

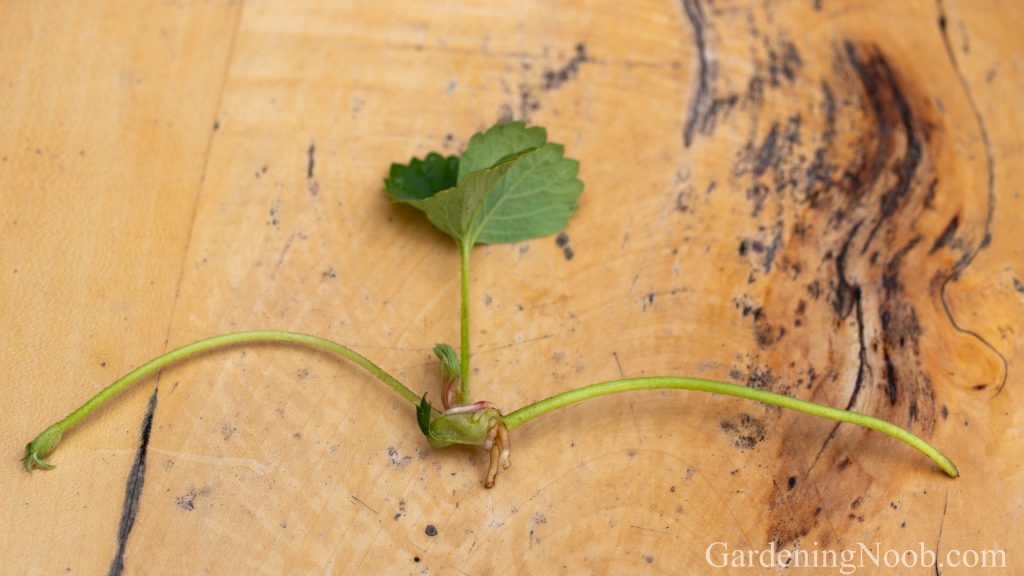
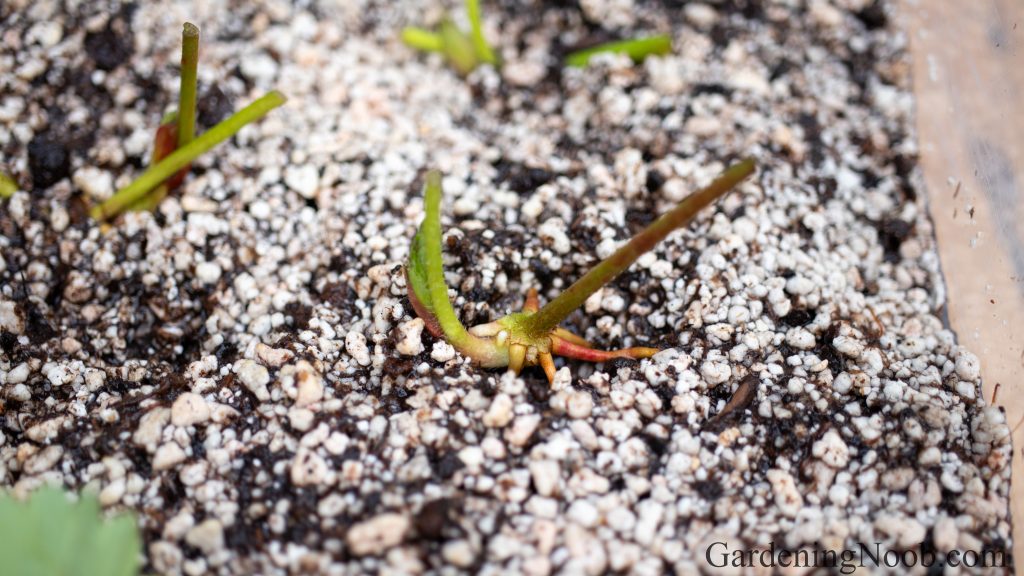
The key to success with this method is finding the most suitable runners. I look for those with already established roots at their nodes. The stronger the roots, the easier it will be for the runner to adjust to its new environment, and the better the chances of growing it into a mature plant.
When I search for runners, I carry a small bucket of water with me. Once I find a good candidate, I cut it from both the mother plant and the adjacent runner (if there is one). I leave about three to five inches of stem on either side of the node – the part of the runner that can develop roots and grow into a mature plant. Then I immediately place it in the bucket to prevent wilting as I search for more.
Step #3: Trim the runners before planting
Once I cut off the runners from the mother plant, their small roots can no longer support all the leaves. So, in the next step, I trim them in the following way:
- I strip most of the leaves from the runners, except the smallest, innermost leaf. I leave this one leaf so the node – I will refer to it as a plantlet from now on – can regrow faster once its roots strengthen.
- I shorten the remaining stems to about two inches from the plantlet. As you will see, I leave these stems because they make it easier to position the plantlet during planting.
- I also remove all the stipules – the short brown and green protective layers surrounding the plantlet – except those around the base.
As I get closer to the base of the plantlet, I am extra careful not to damage it. Since the trimming takes time, I place each trimmed plantlet back into the water-filled container to keep it hydrated while I work on the rest.
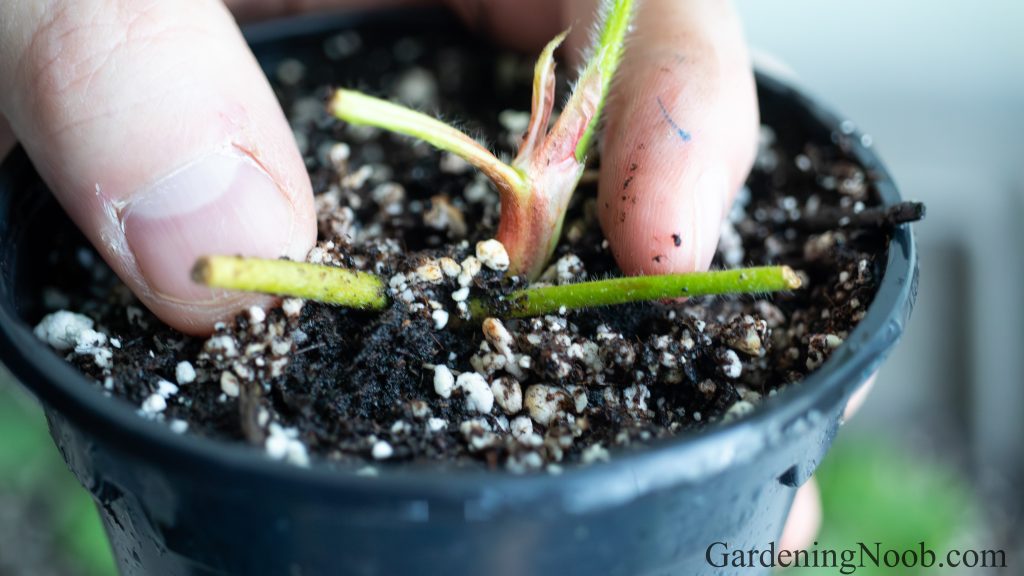
Step #4: Pot the plantlets (runners)
Once I have the pots filled and the plantlets (runners) trimmed, it is time to plant them. First, I water the potting mix to make it easier to work with. Then, I dig a small hole – just deep enough to fit the roots – and place the plantlet halfway in with its roots inside. Finally, I cover the root section of the plantlet with more potting mix and gently press it in.
To prevent rotting, I make sure the base and leaves are positioned above the surface of the potting mix, not below it. I use the remaining stems of the plantlet as a guide. The part of the stems at the base should be in the soil, while the rest should stay visible, with the ends slightly sticking out.
Step #5: Place the pots in a bright, indirect sunlight and keep the potting mix well moist at all times
I place the potted plantlets in a bright but shaded spot after planting. In autumn, a bit of early morning or evening sun during the first week might be fine. In summer, however, I keep them out of direct sunlight for at least a week. You see, at this stage, their small roots struggle to take in water, and even a little direct sun can cause them to wilt beyond recovery!
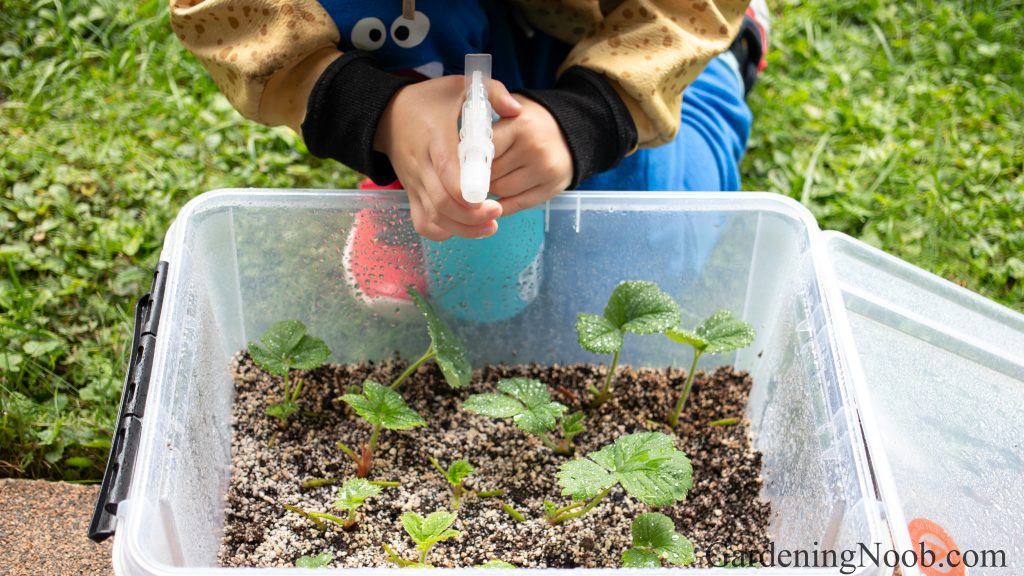
Another thing I pay close attention to in the first week is the moisture level in the potting mix. I check it daily, and if it is not very moist – to the point of being almost soaking wet – I water again. Since plantlets can also absorb water through their leaves and stems, I mist them with a water sprayer too. I do it at least once per day, or more often if I notice signs of wilting.
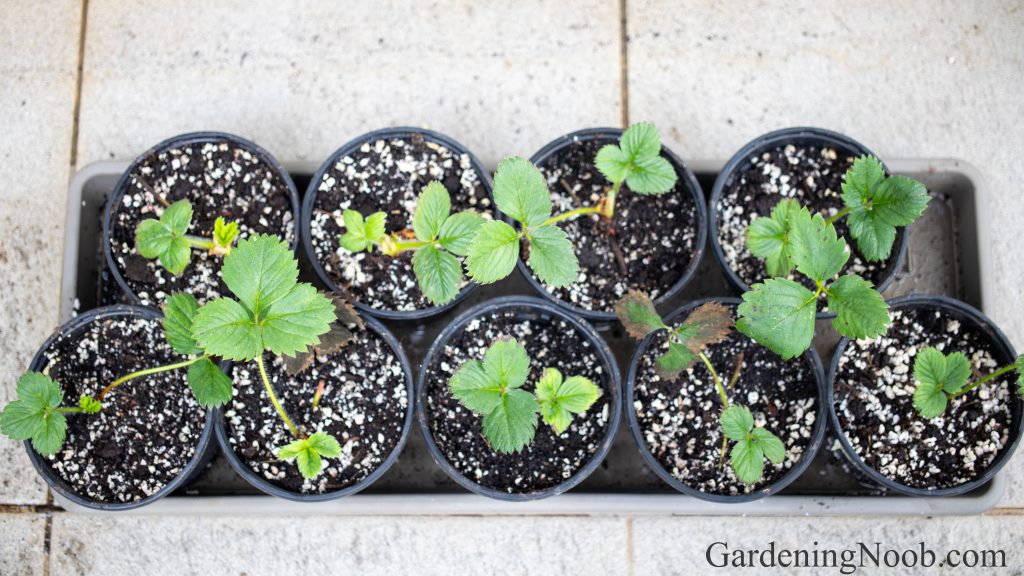
As the plantlets develop stronger roots and no longer apear wilted – usually by the second or third week – I reduce watering and only water when the potting mix begins to dry out. I also gradually introduce them to more sunlight by moving them to a sunnier spot.
Step #6: Transplant them to the garden
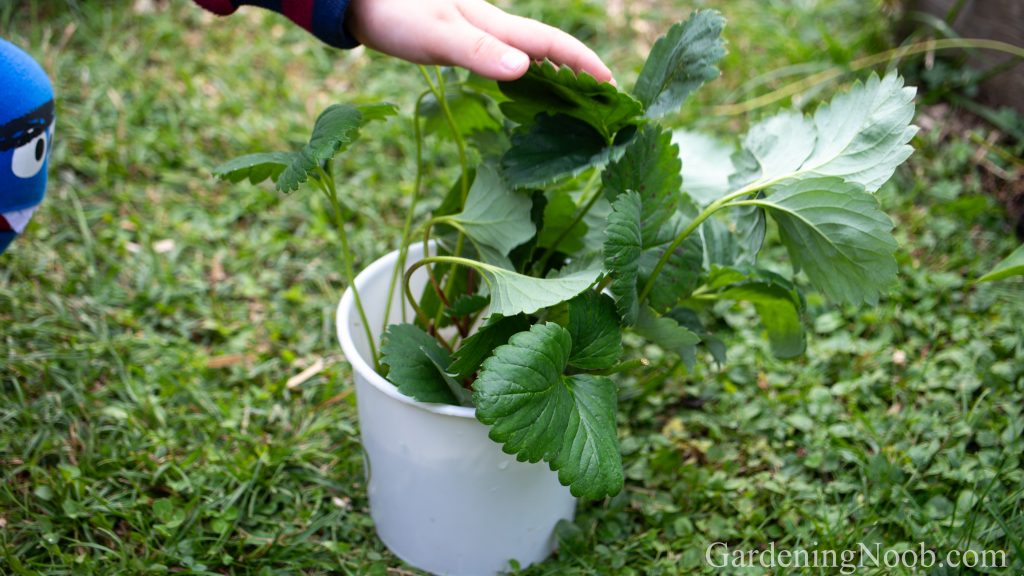
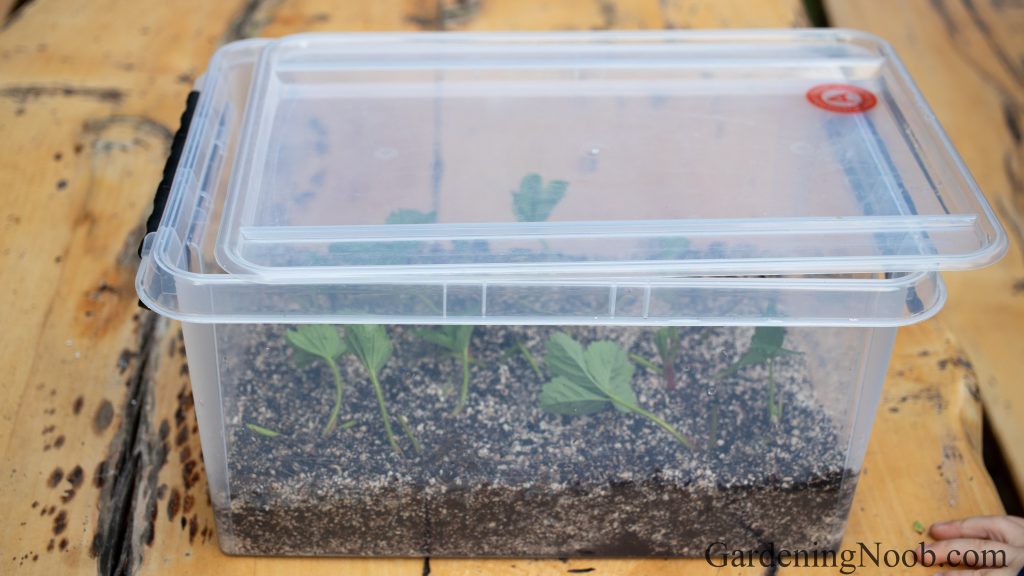
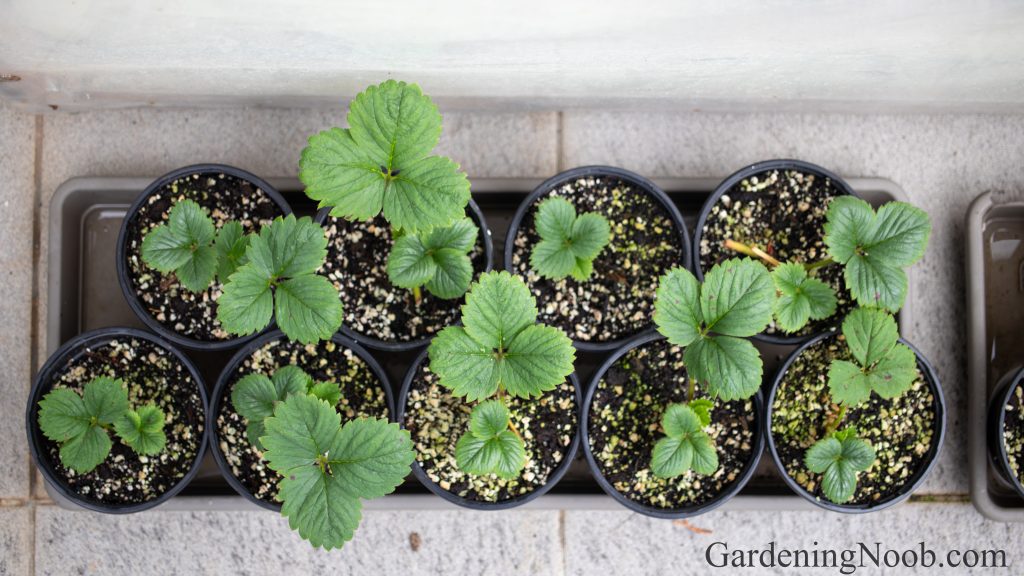
By the end of the third or fourth week, the plantlets should have already matured into self-sustaining plants. You can tell this because:
- They no longer wilt after being in direct sunlight all day.
- They have at least one mature leaf with more new leaves growing.
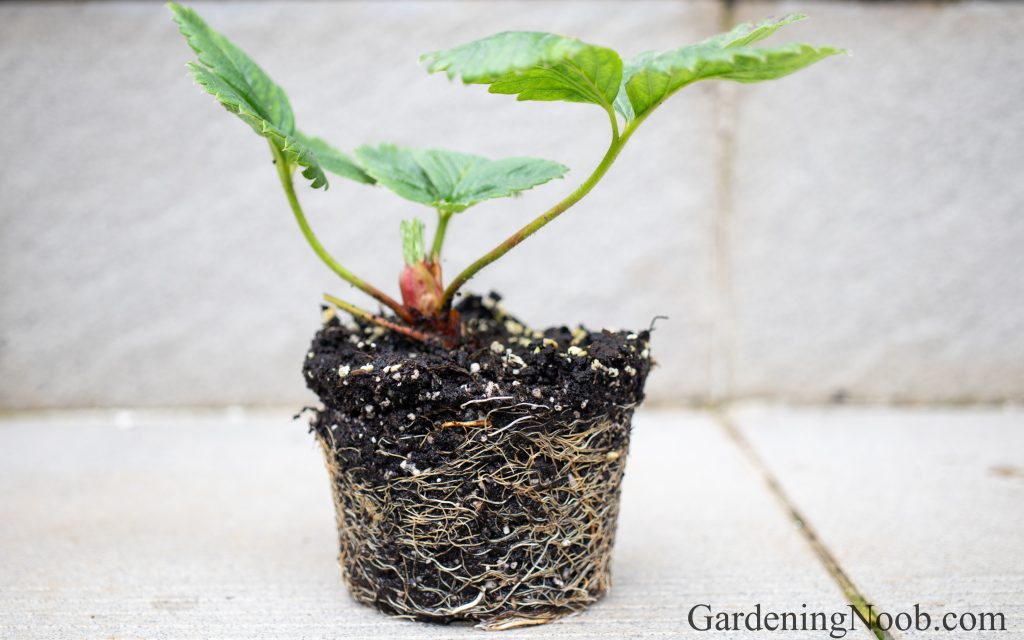
- You can pull them out of their pots and the roots will hold the potting mix in place.
At that point, I know the plant(let)s are ready to move to the garden. Their roots are well-developed, and they have enough leaves to continue growing on their own.
Whether I actually transplant them depends on the time of season. If it is early or mid-autumn, with frost still at least a month away, I go ahead and do it. They will have just enough time to settle in before winter arrives. However, if it is late autumn and frost is imminent, I prefer to keep them in pots over winter. I keep them on a south-facing balcony and protect them from cold with plant covers or place them in miniature greenhouses. I then transplant them when the weather warms up in spring.
One thing to note: the leaf I left on when trimming the runner, as well as some of the newly grown leaves, might have turned brown due to the heavy watering by now. If they have, I simply cut them off, and it is not a problem at all. The plants are strong enough to recover from it. I also remove any new runners the plants might produce.

Don’t worry if you lose some runners along the way when using the cut-and-pot method – it is just part of the process.
The “cut-and-pot” strawberry runner propagation method does work, but I almost always lose a few plants along the way – that is normal. However, when I follow the steps listed above, I have a much better success rate than if I just cut the runner, stick it into ordinary soil or into garden soil, and hope for the best.
That said, I do find propagation to be much more successful in autumn during a rainy period (sometimes even 100%!) than in summer during a hot, dry spell. So, keep in mind that the season and weather make a significant difference too.
The cut-root-and-pot strawberry propagation method
I use it to propagate strawberry runners with little to no roots.
Using the cut-and-pot method, it takes me about three to four weeks to propagate a strawberry runner into a mature plant. With the cut-root-and-pot method, however, it takes about two to three weeks longer because of an additional phase…
This additional phase involves rooting the runners (plantlets) in a root-stimulating soil mixture – what I will refer to as a rooting mix – inside the so called humidity bin. And once the plantlets develop roots, I pot them and grow them in pots until they are ready for transplanting.
Now, before I continue with all the details, I want to point out that some steps – such as finding the runners, trimming them, and planting them as plantlets – are the same as in the cut-and-pot method. So, for the purpose of explaining the cut-root-and-pot method, I will assume that you are already familiar with those. If not, feel free to refer back to them above.
Step #1: Prepare the potting mix in the humidity bin
The idea behind the cut-root-and-pot method is to create a humid environment that not only keeps the plantlets growing but, more importantly, boosts their root growth. This makes them much more likely to survive potting – even in the summer heat.
There are two key things that make this method work:
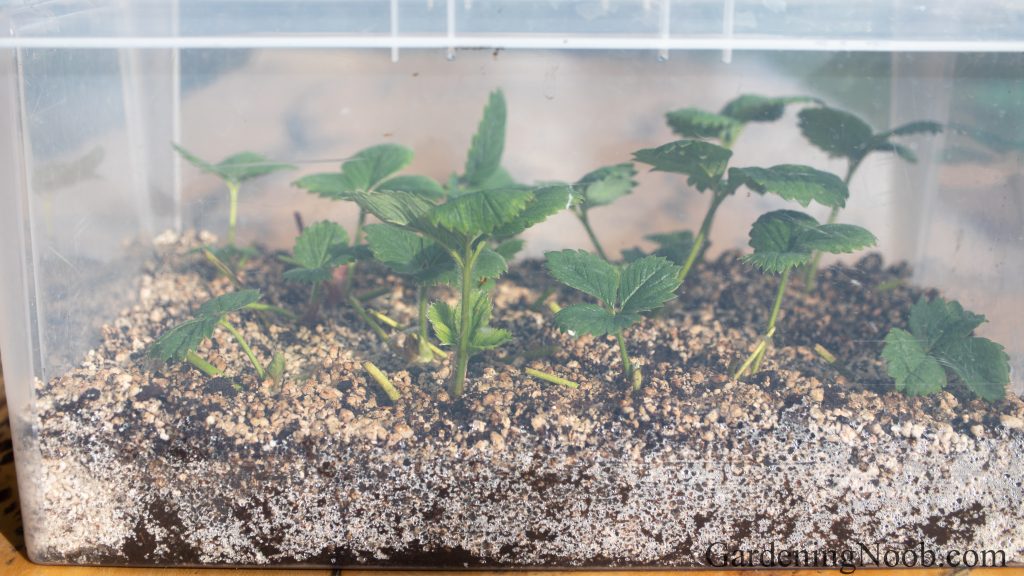
- The humidity bin. This is simply a clear plastic storage bin (or a transparent container) that you can easily find at any home improvement store. It needs to be transparent so that light can get in, and it should have a lid to retain moisture.
- A rooting mix. As mentioned earlier, this is a well-draining, moisture-retentive soil mixture made from one part peat moss and two parts perlite.
In the first step, I take a humidity bin and fill it with the rooting mix to a depth of about 6 centimeters (2.5 inches). I usually prepare the rooting mix directly in the bin because it is easier, but you can pre-mix it elsewhere if you prefer.
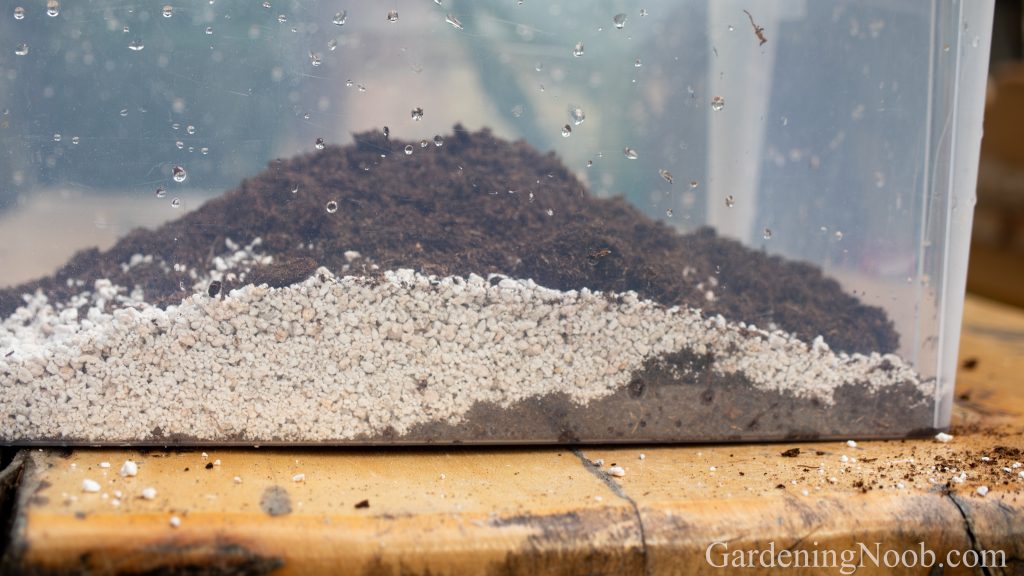
The bin I use is about 40 centimeters (16 inches) long, 30 centimeters (12 inches) wide, and 19 centimeters (7.5 inches) deep. It can accommodate about 10 to 15 plantlets at a time. You can use a smaller one or a larger bin, depending on how many runners you plan to propagate.
Step #2: Water the rooting medium well
In the next step, I thoroughly water the rooting mix in the humidity bin. As I water, I stir the mix to ensure all parts are evenly moistened. To check, I touch the mix – it should feel wet, and some dirt should stick to my fingers. I also poke a hole down to the bottom of the bin with my finger. There should be some water at the bottom of the hole, but no more than halfway up the hole. If it fills more, it means there is too much water in the mix and you will need to drain some.
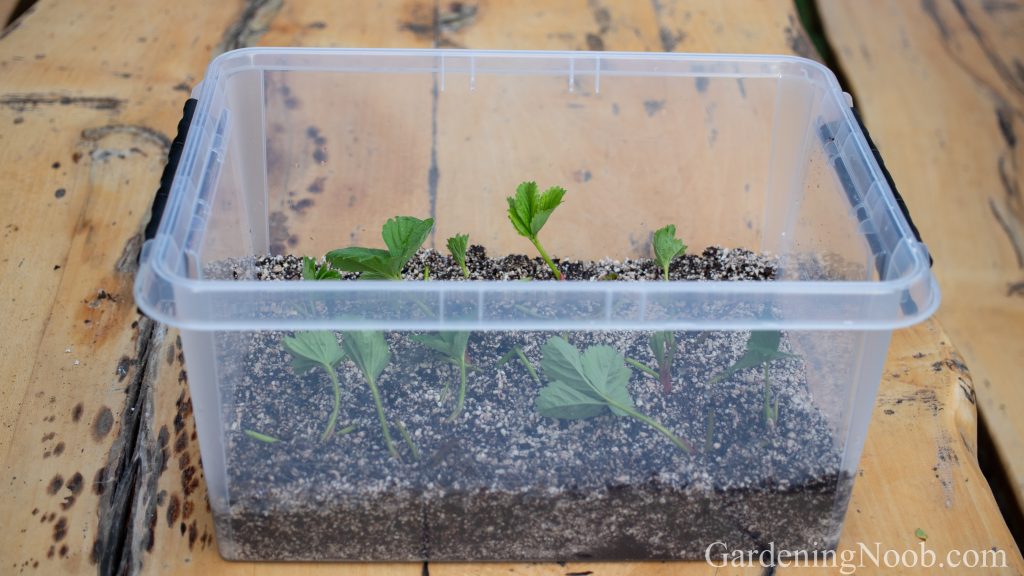
Step #3: Place the runners in the rooting mix
The planting process is very similar to the cut-and-pot method I described earlier. Once I trim all the runners (plantlets) I intent to root (find the instructions in step #3 of the first method described, the cut-and-pot method), I dig a small hole in the rooting mix, place the plantlet halfway in with the roots pointing down, and then cover the root section with the mix.
Here too, I use the remaining stems of the runner to position it properly. However, I avoid pressing the plantlet into the mix because this mix is harsher and more compact, and pressing could damage it.
I space the plantlets about five centimeters (two to three inches) apart so they all receive enough light and to prevent their roots from becoming intertwined as they grow. This spacing also makes it easier for me – and less stressful for the plantlets – to take them out of the humidity bin when it is time to pot them.
Step #4: Place the humidity bin in a bright area with indirect sunlight that does not get direct sunlight
Once I finish planting, I cover the bin with the lid and place it in a bright, rain-protected area that does not get direct sunlight. The northern or northwestern side of the house works well for this.
I leave the bin partially open at one end to allow air to circulate. This keeps the inside of the bin cooler, prevents rotting, and still retains most of the humidity. During the first two weeks – especially in summer – I avoid direct sunlight entirely since it can overheat the bin and turn it into a baking oven within minutes!
After about two weeks, to be on the safe side, you can slowly introduce the plants to some direct sunlight. Don’t overdo it, though. Just like with the cut-and-pot method, a bit of morning sun and some later afternoon sun is enough.
Step #5: Mist plantlets daily with water
If I properly moisten the potting mix before planting, and if I keep the bin in a bright but shaded area with the lid only partially open, I don’t need to water the mix again. It stays sufficiently moist for the entire rooting period, which usually takes about three to four weeks.
I do, however, like to mist the plantlets regularly with a spray bottle (mister) – just as I do with the cut-and-pot method. It helps them absorb water through their leaves and stems. In summer, I mist daily for the first two weeks when the plantlets are very vulnerable. After that, I only do it after they have been exposed to direct sunlight – they tend to wilt afterward, and misting helps them recover more quickly.
Step #6: Pot the rooted plantlets
The rooting mix contains no nutrients, but even so, the plantlets start growing new leaves while still in the bin. By the time their roots are strong enough for potting – typically in two to three weeks – they already resemble well-established plants.
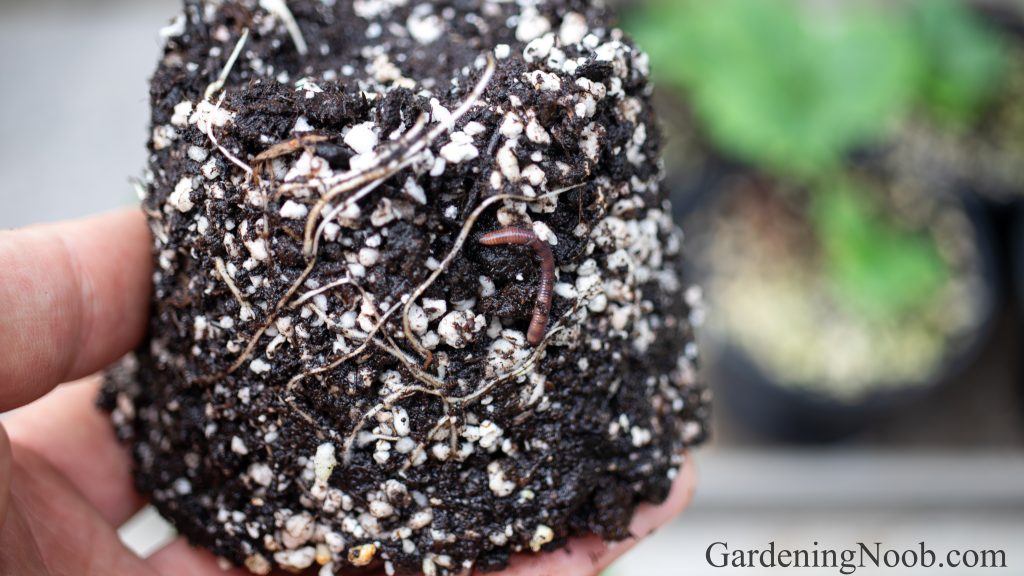
To help plantlets settle more quickly, I try not to disturb the roots too much when potting. I carefully take them out of the bin. I take as much of the rooting mix with them as I can to keep the root ball intact. A spoon is very useful here – it helps me keep the root ball of the plantlet nearly intact during the transplantation.

For potting, I use the same pots and the same potting mix as in the cut-and-pot method. The pots are 10 centimeters (5 inches) wide at the top and 8 centimeters (4 inches) deep. The potting mix is made from two parts regular potting soil, two parts perlite and one part earthworm castings. I also make sure the plantlets are potted at the same depth they were in the bin – no deeper and no higher. Once I finish, I water them from below.
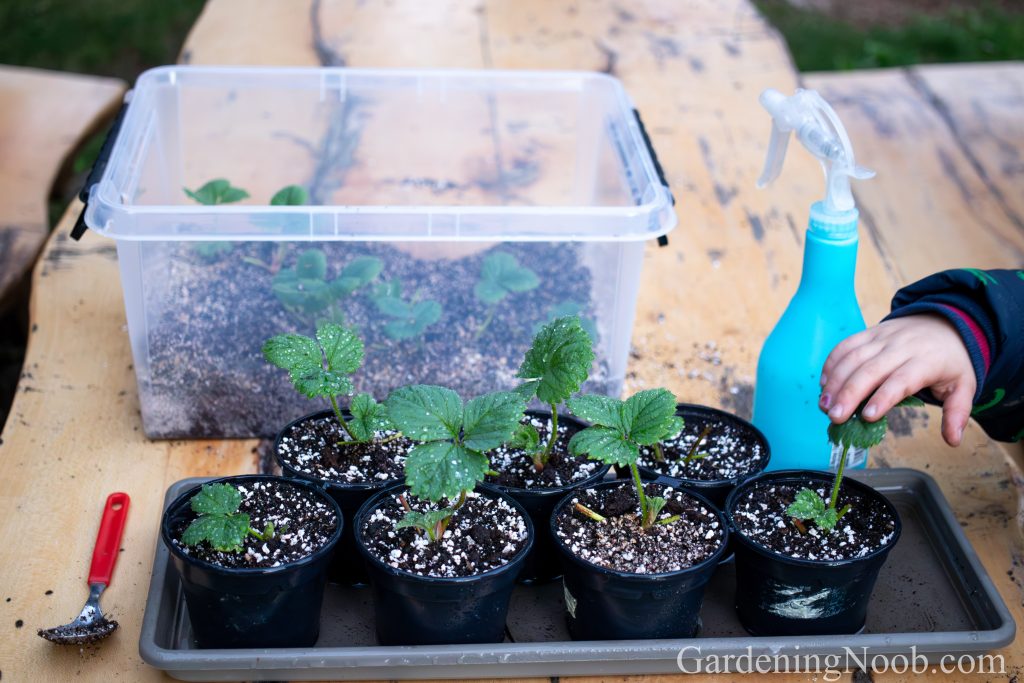
Step #7: Grow the plantlets in pots for at least another two weeks
Although the plantlets barely notice the move to pots and usually recover quickly from it, I avoid keeping them in direct sunlight for the first two to three days after transplantation – especially if I am doing it in summer. If, after that time, the plants look good – which means there is little to no wilting – I move them to the south-facing balcony where they get plenty of sun and keep them there for about three more weeks.
I definitely water them during this final stage, but the frequency depends on the weather conditions. In summer, when they are in full sun, I do it every day. In autumn, when it is rainy or cloudy, I may not need to water them for several days.
After they have been in the pots for more than three weeks, I consider the plants to be fully established and strong enough to be planted in the garden. Whether I actually transplant them depends on the season. If it is late summer or early autumn, I wait for some rain to ensure the garden soil is moist enough and plant them out immediately afterward. However, if winter is just around the corner, I keep them in pots, slightly protected from the cold – by either placing them in a miniature greenhouse or covering them with frost blankets during frosts and freezes – and wait until spring to plant them out.
Which strawberry runner propagation method should you choose?
Now that I have shared all the details about the two methods I use to propagate strawberry runners into new plants, you understand the pros and cons of both methods. So, which one should you choose?
Well, the cut-and-pot method is simple and straightforward, but also comes with higher risks. It can have a dishearteningly low success rate in summer. I avoid using it during that time because it is difficult to find runners with even partially developed roots. What is more, the plantlets are far more likely to wilt in hot, sunny weather, and often don’t recover from it, even if I keep them in full shade all day.
I love to use it in autumn, though, after it has rained for several consecutive days, when the humidity is high and temperatures are moderate. In such weather, I can easily find runners with well-established roots, and I am much more successful in growing them into mature plants!
On the other hand, the cut-root-and-pot method requires more work and more resources, but I can propagate almost any runner with it, in any weather conditions, even if the runners are small, underdeveloped, and have roots that are nonexistent. There is no root rot, and the plantlets look healthier too, with little to no brown leaves.
So, the answer depends largely on the season. But if I were in your shoes, I would also consider the number of runners you have available, as well as the time and the resources you are willing to use.
That is it! I hope you soon enjoy the fruits of your newly propagated plants. And if you have any more questions about how to propagate runners into new strawberry plants, feel free to get in touch – either by leaving a comment below or through my social media profiles (Facebook, Instagram and Youtube).